EASY CROCHET BAG FOR BEGINNERS | SIMPLE CROCHET PURSE… Crochet is an ancient craft that has gained popularity in recent years due to its versatility and the creativity it allows in producing a wide range of projects, including unique accessories like bags. If you’re interested in learning how to make a crochet bag, this article will guide you step by step through the process—from gathering materials to the finishing touches.
Materials Needed
Before you begin making your crochet bag, make sure you have the following materials:
- Yarn: Choose cotton or acrylic yarn that is durable and has a texture you like. If it’s your first time making a bag, it’s recommended to use medium-weight yarn for easier handling.
- Crochet Hook: The size of the hook should match the thickness of the yarn. Generally, a 4 mm to 5 mm hook is ideal, but you can adjust this depending on the yarn you choose.
- Scissors: You will need scissors to cut the yarn.
- Stitch Markers: If you’re working in rounds or spirals, stitch markers will help you keep track of the beginning of each round.
- Fabric Lining (optional): If you want to add more structure or durability to your bag, you can sew in a fabric lining.
- Closure or Button (optional): If you’d like your bag to be more secure, you can add a zipper or button.
1. Choose the Bag Design
There are many different types and styles of crochet bags, so it’s important to decide which one you’d like to make. Common designs include:
- Tote Bag: A large, roomy bag ideal for carrying many items.
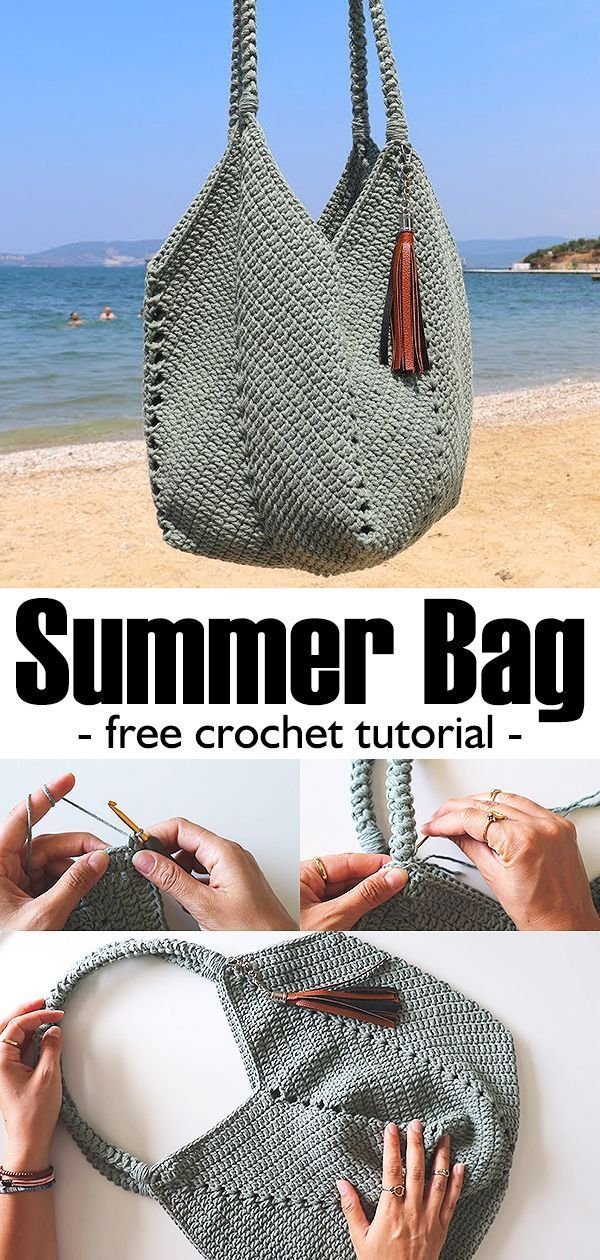
- Shoulder Bag: A bag with a long strap, perfect for carrying over the shoulder.
- Clutch or Small Handbag: A smaller, more elegant bag for formal events or casual outings.
Deciding on the style before you begin will help determine the shape and size of the bag, as well as the pattern you will follow.
2. Start the Bag: Basic Stitch and Base
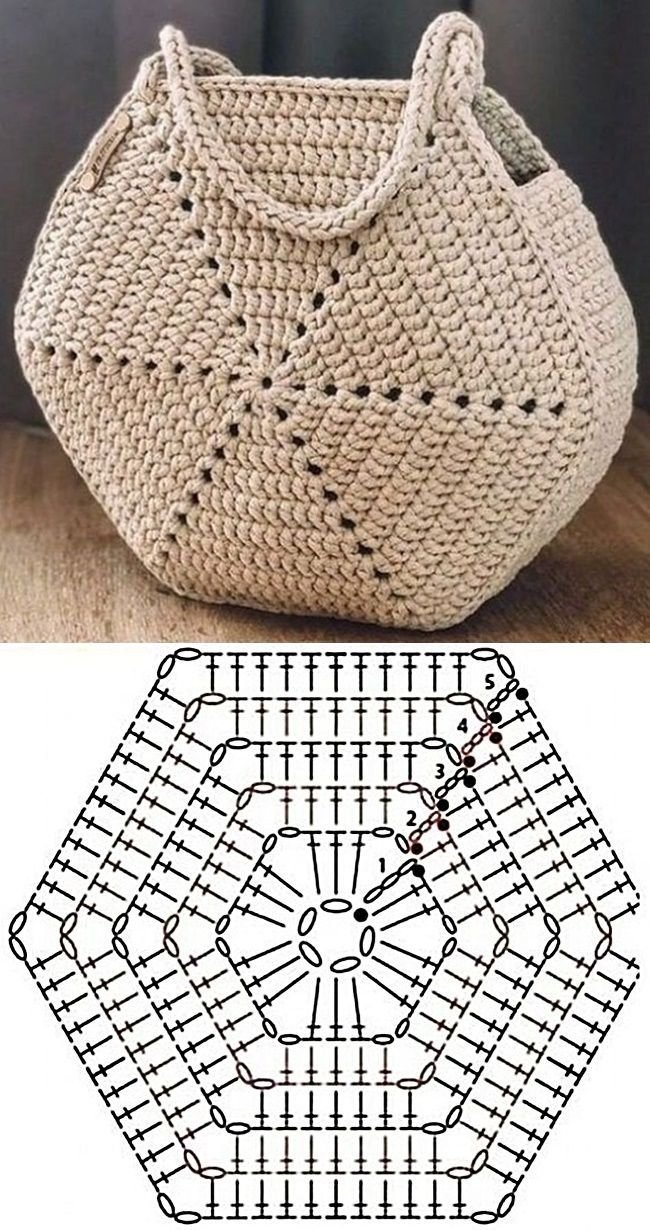
Most crochet bags begin with the base, and typically, you’ll work in a spiral or in rounds. The basic stitch most commonly used for bags is the single crochet stitch (or slip stitch).
Step 1: Make the Initial Ring
Start by making a magic ring, which will allow you to close the center of your bag. If you’re unsure how to make a magic ring, you can create a chain of 4 stitches and join it to form a loop. This will serve as the base of your bag.
Step 2: Crochet the Base
Crochet in rounds, gradually increasing each round to make the base of the bag flat. To do this, in each round, you will make 2 single crochet stitches into each stitch from the previous round. This is a basic increase, and it is repeated each round to expand the base evenly.
If you prefer a more structured bag, you can alternate between single crochet and double crochet to give the base more texture.
3. Build the Sides of the Bag
Once the base is finished and you’ve reached your desired diameter, it’s time to start working on the sides of the bag. At this point, you will stop making increases and begin crocheting in even rounds so that the sides of the bag have a consistent height.
Step 1: Crochet the Height
To do this, simply continue crocheting with your chosen stitch (usually single crochet) around the base without making any increases. The height of the sides will depend on how tall you want the bag to be. Typically, a medium-sized bag is between 20 and 30 cm (8 to 12 inches) tall.
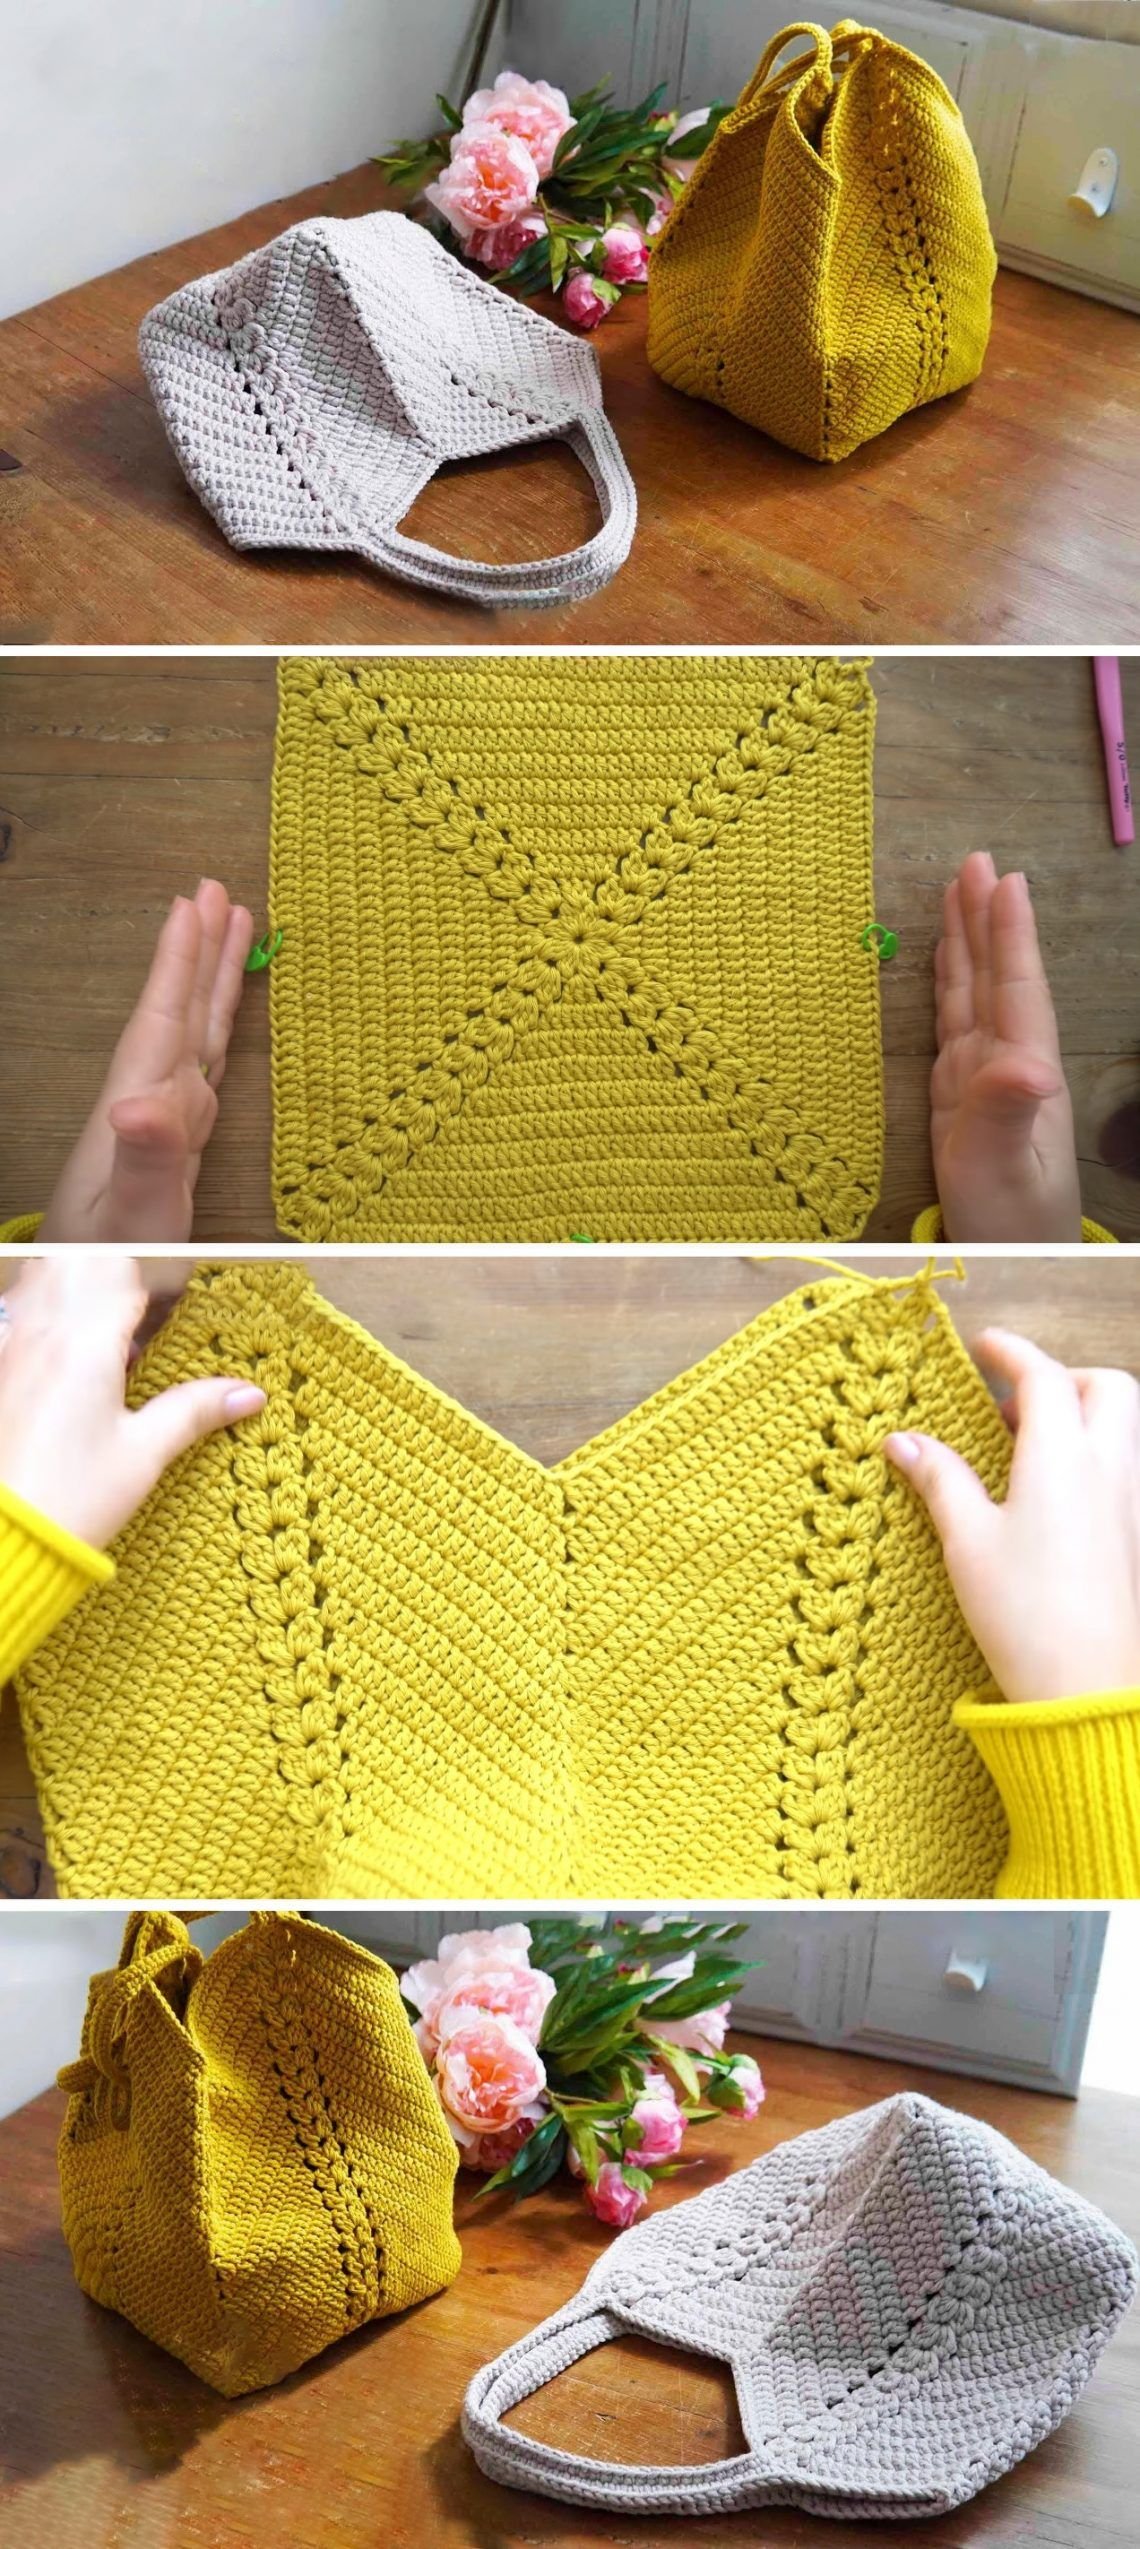
Step 2: Add a Pattern (optional)
If you’d like to add a special touch to your bag, you can incorporate patterns into the side portion. For example, you could alternate between single and double crochet stitches, or even add decorative details like braids or lace patterns to make the bag more unique.
4. Make the Bag Handles
The handles are one of the most important features of any bag. Handles can be long or short, depending on the style of bag you’re making.
Step 1: Crochet the Handles
To make a simple handle, crochet a chain of approximately 50 to 60 stitches (or more, depending on the size you want). Then, work back along the chain with single crochet stitches until the handle reaches your desired thickness. If you want a sturdier handle, you can crochet several chains together and join them.
Step 2: Attach the Handles to the Bag
Once you’ve finished crocheting the handles, it’s time to attach them to the top of the bag. Use a yarn needle and the same yarn to sew the handles onto the bag securely. Be sure to sew them tightly so they can hold the weight of the items you’ll be carrying in your bag.
5. Final Touches
To give your crochet bag a professional and polished look, consider adding a few finishing touches:
- Lining: If you want your bag to be more structured and durable, sew a fabric lining into the inside. This will also prevent the crochet yarn from fraying with use.
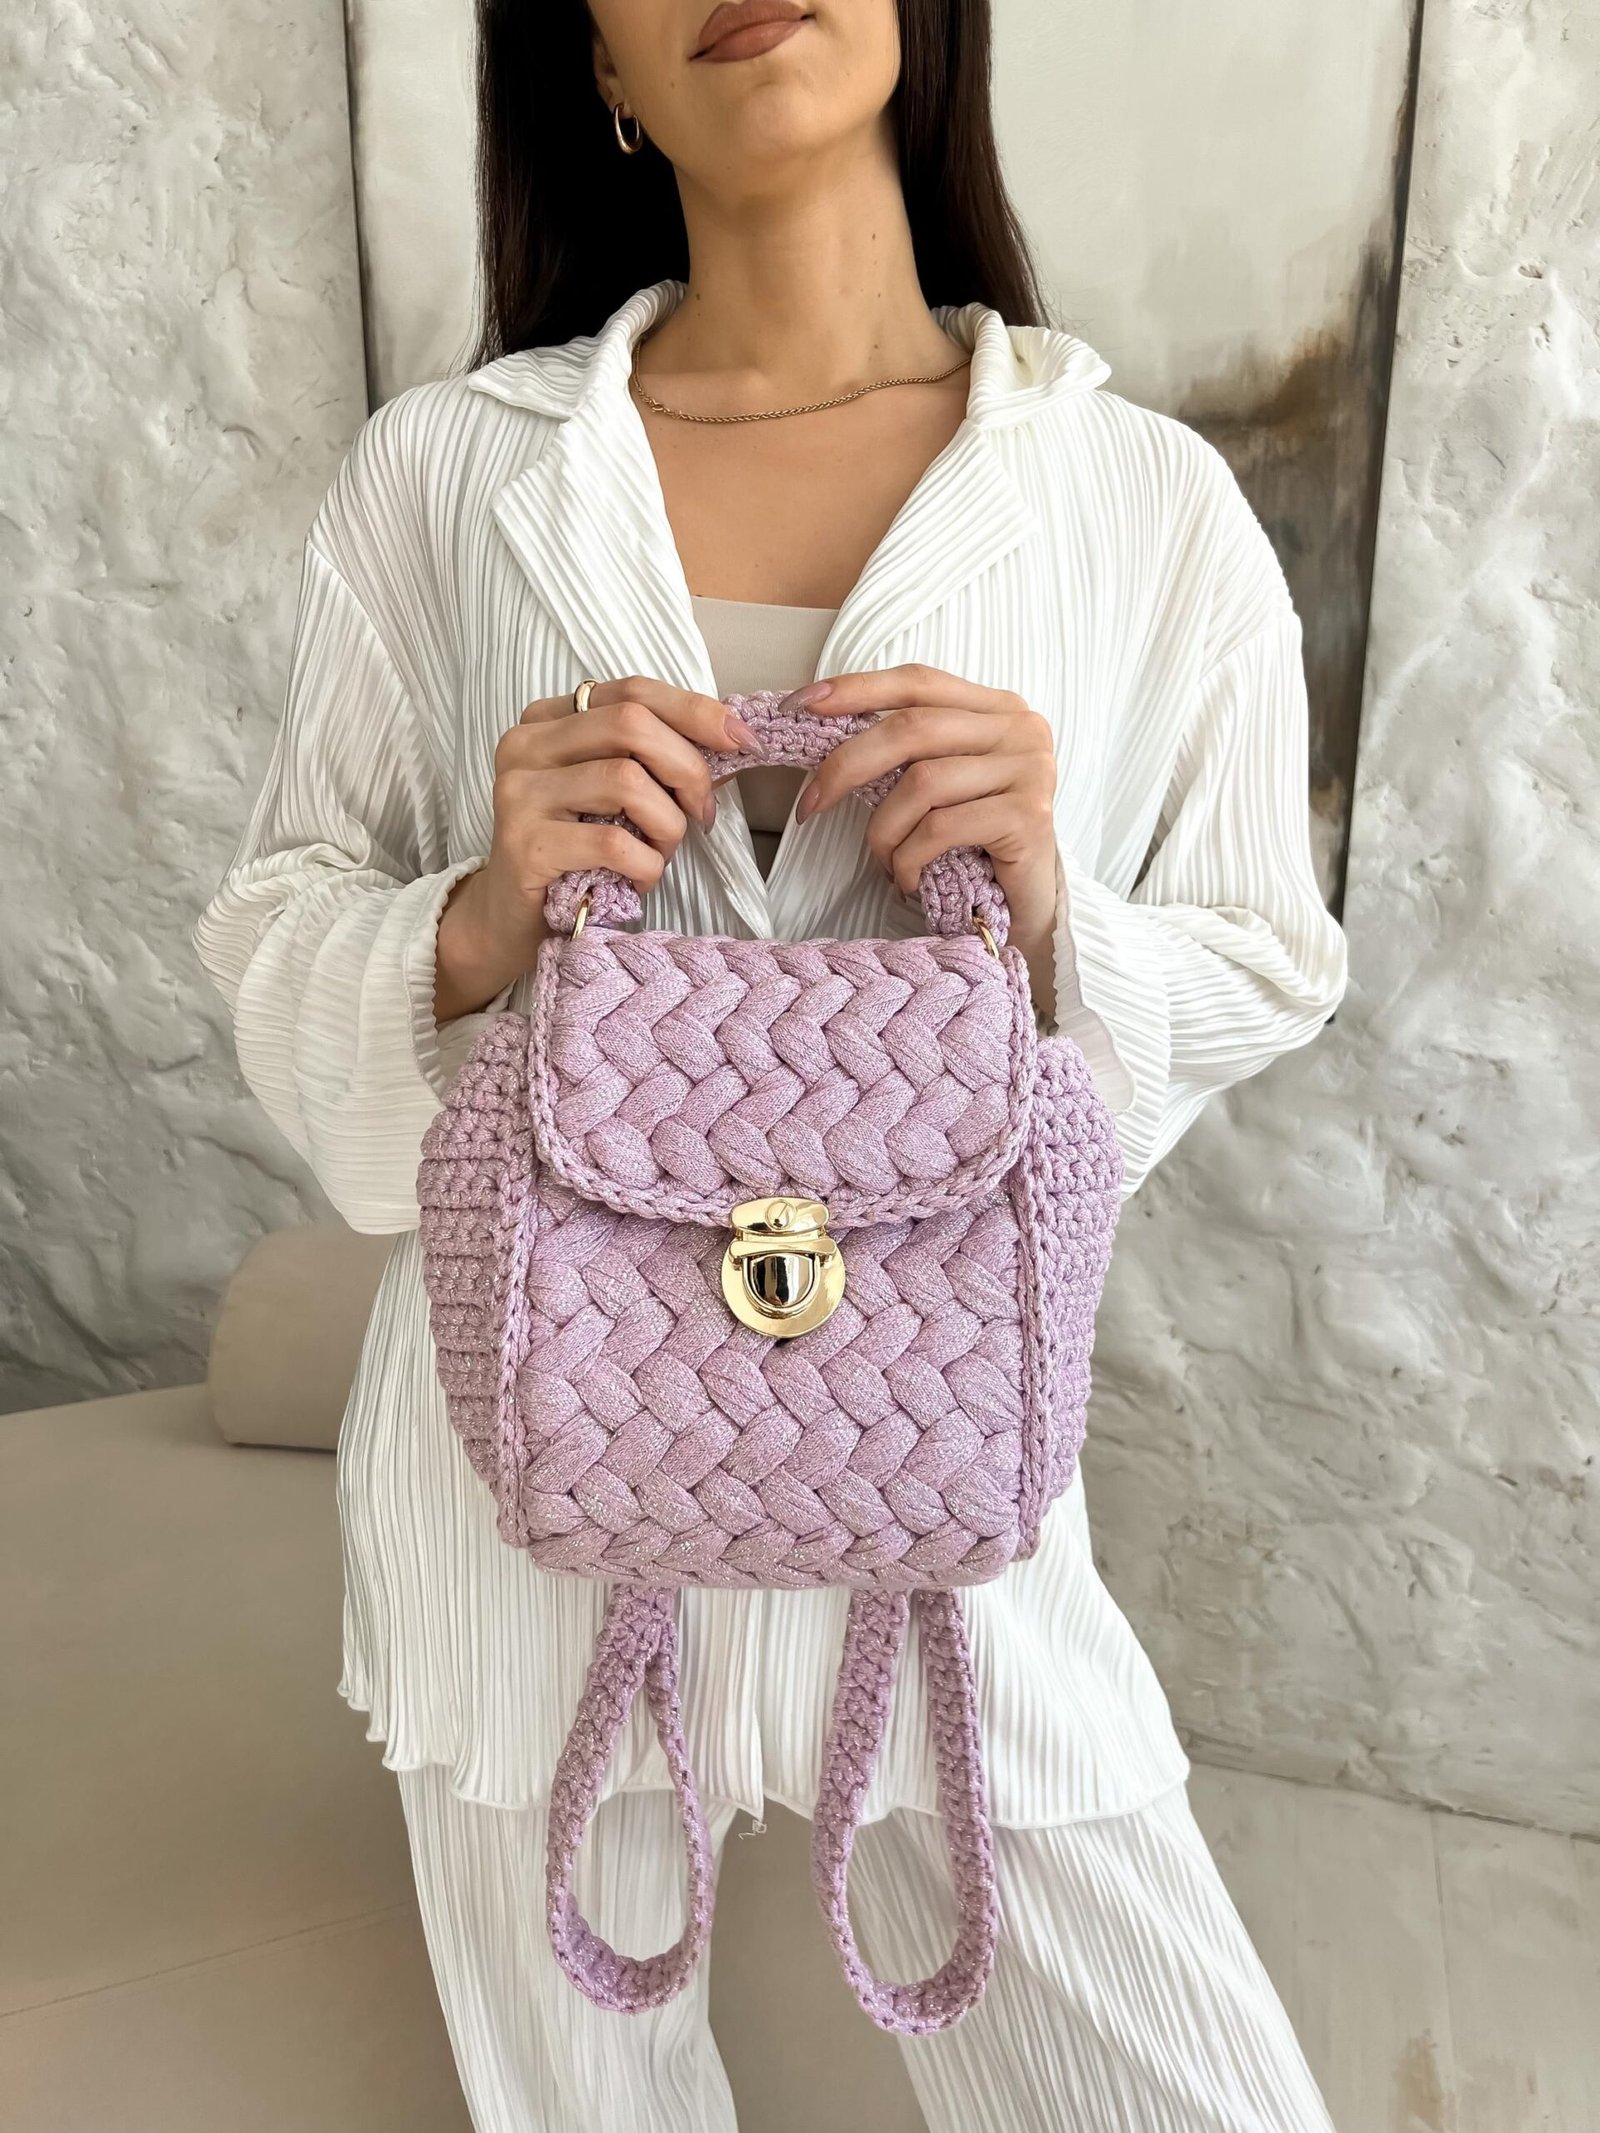
- Closure or Button: If you’d like to make your bag more secure, you can add a button or a zipper to the top. This will give your bag a more polished look and make it more functional.
Making a crochet bag is a wonderful way to practice your crochet skills while creating something functional and stylish. Although it may seem challenging at first, with patience and practice, you will be able to create a beautiful, unique bag that reflects your personal style.
Plus, crochet is a versatile craft, so feel free to experiment with different yarns, colors, and patterns to create bags for any occasion. Whether it’s a casual tote, a chic clutch, or a practical shoulder bag, the possibilities are endless!