Crocheting a rug involves several steps, from selecting the right materials to finishing the project. Here’s a detailed guide on how to crochet a basic rug, covering different types for various needs. This will give you a good foundation whether you’re making a circular, rectangular, or oval rug.
How to Crochet a Quick & Easy Rug:
Crochet rugs are a fantastic way to add a personal touch to your home decor. They come in a variety of styles and techniques. Here are five popular types of crochet rugs and instructions on how to make them:
1. Circular Rug
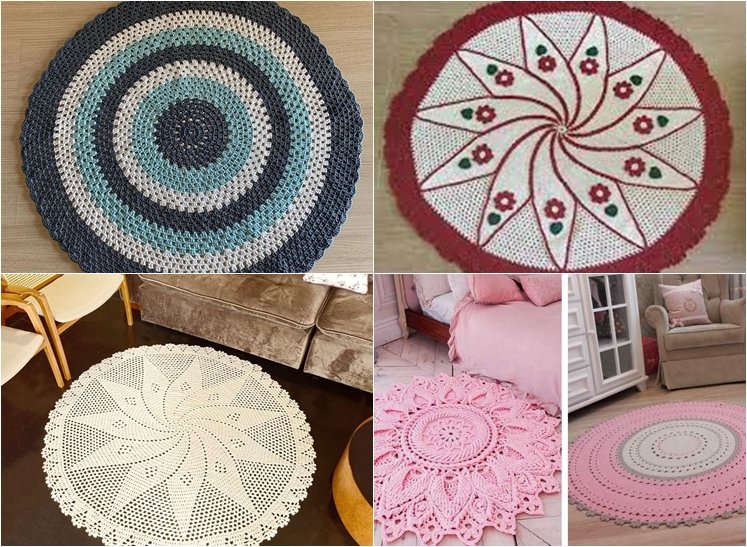
Materials:
PUBLICIDADE
- Yarn (bulky or chunky recommended)
- Crochet hook (size recommended on yarn label)
- Scissors
- Yarn needle
Instructions:
- Magic Ring: Create a magic ring by making a loop with the yarn and pulling the working yarn through it to form a knot. Alternatively, you can start with a chain of 4 and join to form a ring.
- Round 1: Into the magic ring (or chain ring), work 6 single crochet (sc) stitches. Pull the ring tight to close the center.
- Round 2: Work 2 sc in each stitch around (12 stitches total).
- Round 3: 1 sc in the first stitch, 2 sc in the next stitch — repeat around (18 stitches total).
- Round 4: 1 sc in each of the next 2 stitches, 2 sc in the next stitch — repeat around (24 stitches total).
- Rounds 5 and beyond: Continue increasing by adding an extra sc between increases as needed. For example, in Round 5, you would work 1 sc in each of the next 3 stitches, then 2 sc in the next stitch (30 stitches total). Adjust the number of stitches between increases to keep the rug flat as it grows.
- Finish: Continue until the rug reaches the desired size. Fasten off the yarn, cut it, and use a yarn needle to weave in the ends.
2. Oval Rug

Materials:
- Yarn (medium or bulky)
- Crochet hook (appropriate size for yarn)
- Scissors
- Yarn needle
Instructions:
PUBLICIDADE
- Foundation Chain: Chain the desired length of the oval’s width. For example, if you want a 24-inch wide rug, chain about 24 inches worth of stitches.
- Row 1: Work 1 sc in each chain stitch across the row.
- Row 2: Turn your work. Work 1 sc in the first stitch, 2 sc in the last stitch of the row to start forming the curve.
- Increase Rows: Continue with 1 sc in each stitch across, increasing 1 stitch at each end of the row (e.g., 2 sc in the first and last stitches) until you reach the desired width.
- Continue Rows: Once the width is correct, work sc rows without increasing to the desired length of the rug.
- Finish: Fasten off and weave in all loose ends.
3. Rectangular Rug
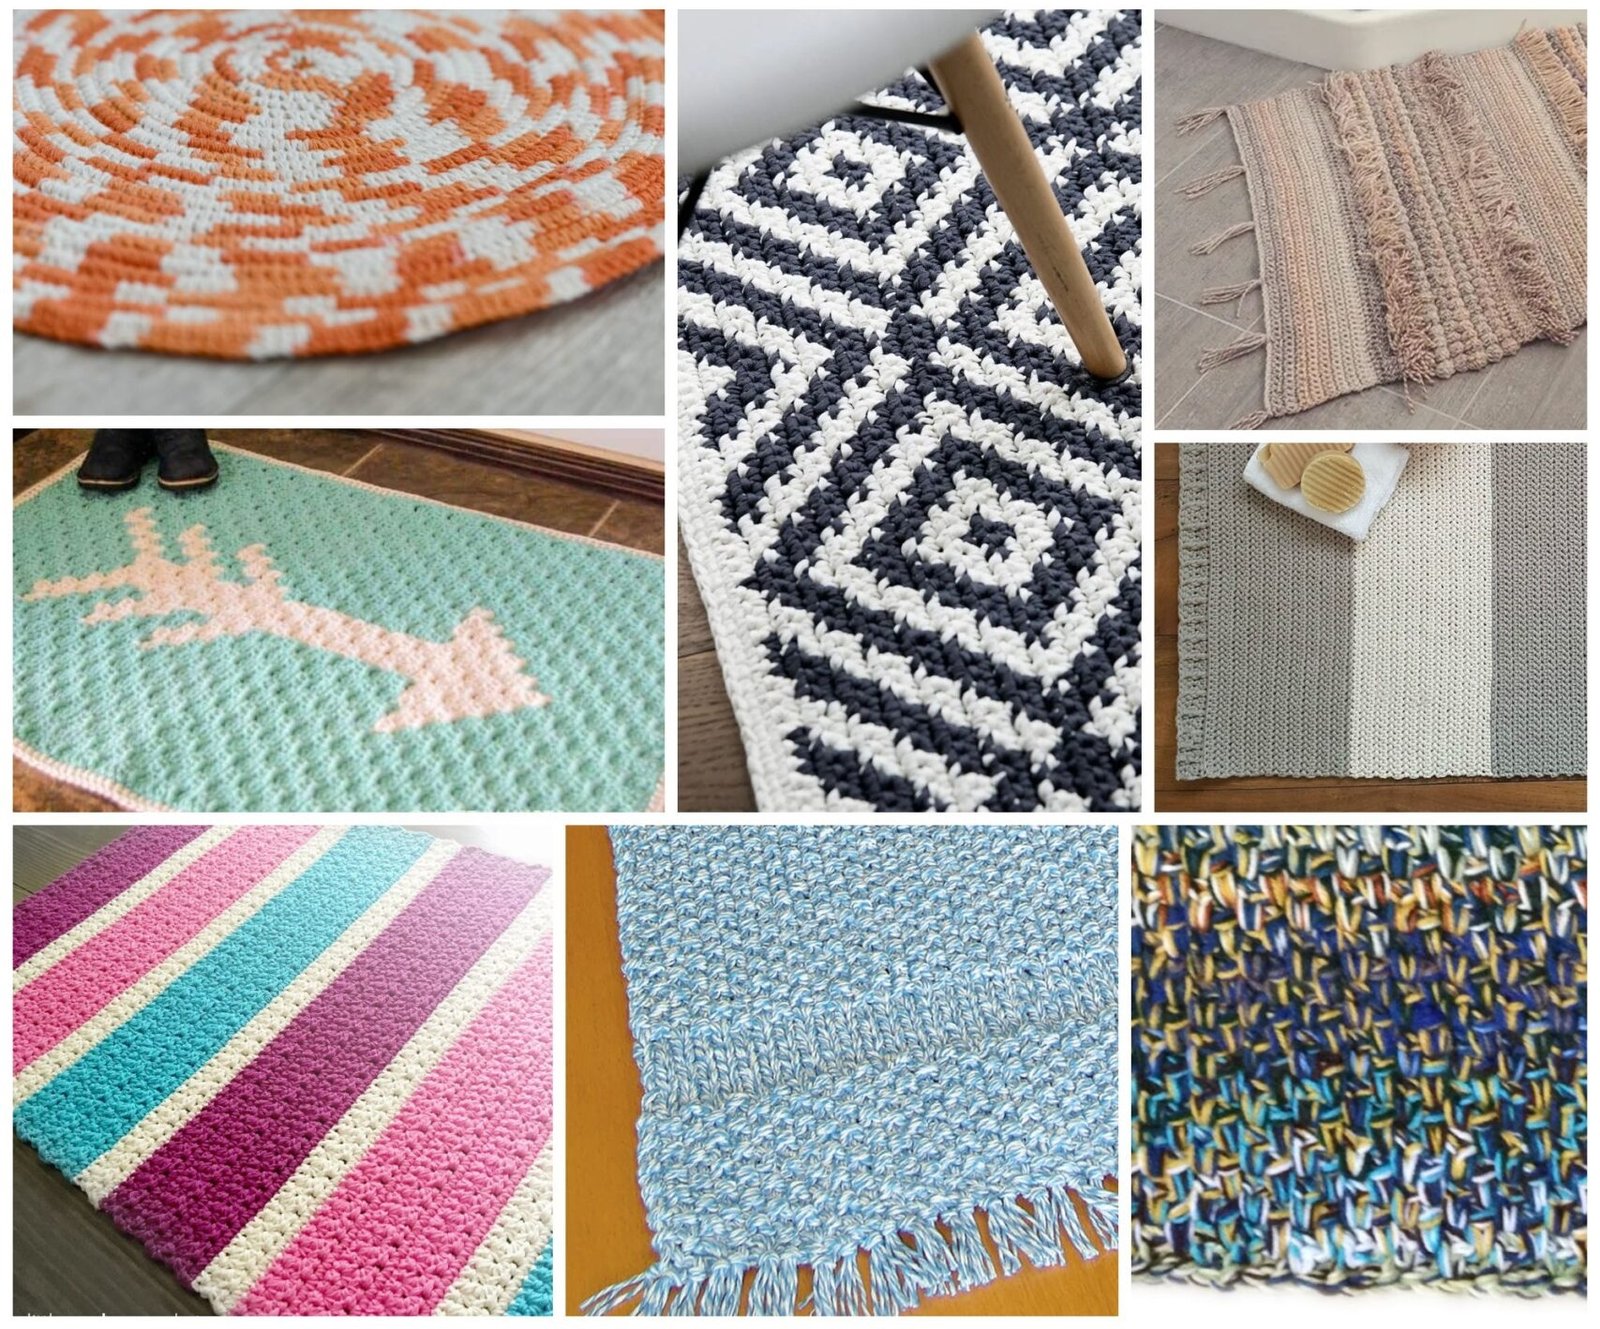
Materials:
- Yarn (bulky or super bulky)
- Crochet hook (size recommended on yarn label)
- Scissors
- Yarn needle
Instructions:
- Foundation Chain: Chain to the width of your rug. For example, if you want a rug that is 30 inches wide, chain about 30 inches worth of stitches (usually a multiple of the stitch pattern you’re using).
- Row 1: Work 1 sc in each chain stitch across the row.
- Row 2: Turn the work. Work 1 sc in each stitch across the row.
- Increase Rows (if needed): If you need to adjust the width, you can add extra stitches at the beginning or end of each row.
- Continue Rows: Work rows until the rug reaches the desired length.
- Finish: Fasten off and weave in any loose ends.
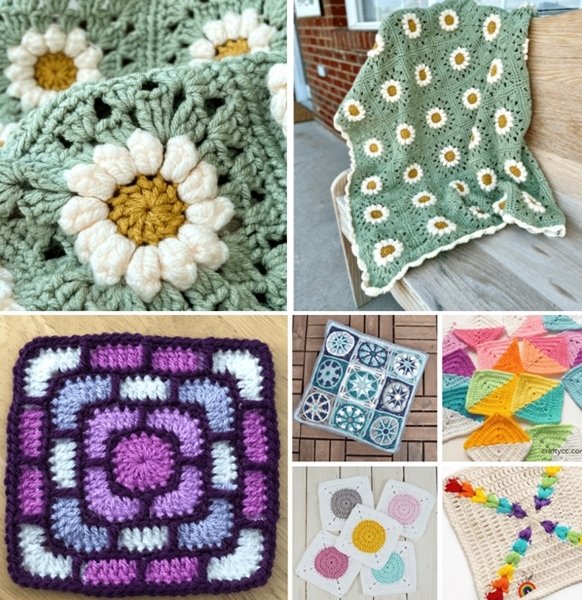
4. Granny Square Rug
PUBLICIDADE
Materials:
- Yarn (multiple colors if desired)
- Crochet hook (size recommended on yarn label)
- Scissors
- Yarn needle
Instructions:
- Start with a Slip Knot: Make a slip knot and chain 4. Join with a slip stitch to form a ring.
- Round 1: Chain 3 (counts as first dc), work 2 dc into the ring, chain 2, 3 dc into the ring, chain 2 — repeat 3 times. Join with a slip stitch to the top of the starting chain 3.
- Round 2: Slip stitch to the corner space, chain 3 (counts as first dc), work 2 dc, chain 2, 3 dc, chain 2 in each corner space, join with a slip stitch.
- Round 3: Repeat the process, working 3 dc in each corner space and chain 2 between clusters.
- Join Squares: Arrange the squares in the desired pattern and join them using a whip stitch or slip stitch method, connecting through the back loops to keep the rug flat.
- Border (Optional): Add a border around the joined squares by working sc or a decorative stitch of your choice around the entire rug.
- Finish: Weave in all loose ends.
5. Rag Rug
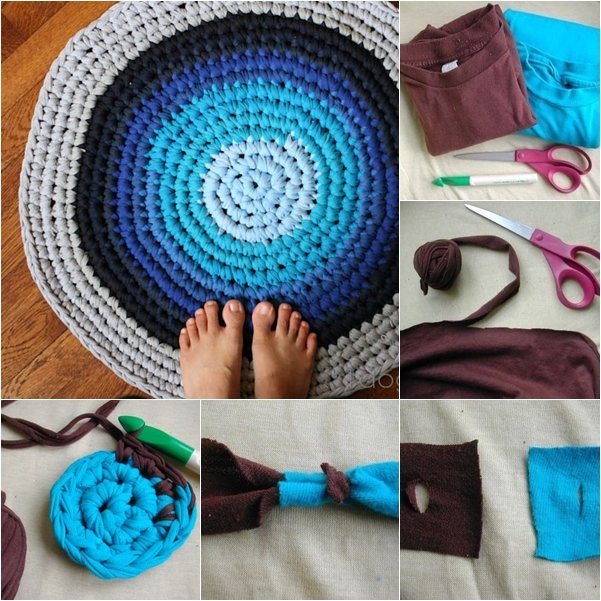
Materials:
- Old fabric or fabric strips (1-inch wide strips recommended)
- Crochet hook (usually larger size, like 10mm or larger)
- Scissors
- Yarn needle
Instructions:
- Prepare Fabric Strips: Cut old fabric (like t-shirts or sheets) into 1-inch wide strips. Knot the ends of each strip together to make one continuous strand.
- Foundation Chain: Chain the desired width of your rug.
- Row 1: Work 1 sc in each chain stitch across the row.
- Row 2 and onwards: Turn the work and sc in each stitch across. You may need to work loosely to accommodate the bulkier fabric.
- Increase Rows (if desired): Add extra stitches at the edges of each row to maintain the shape if the fabric causes the rug to curl or pucker.
- Finish: Fasten off and weave in all loose ends.
These detailed steps should help you create beautiful and functional crochet rugs for your home. Enjoy your crafting!
PUBLICIDADE